Rigify Retarget
Version 1.0
Blender 3.6
Installation
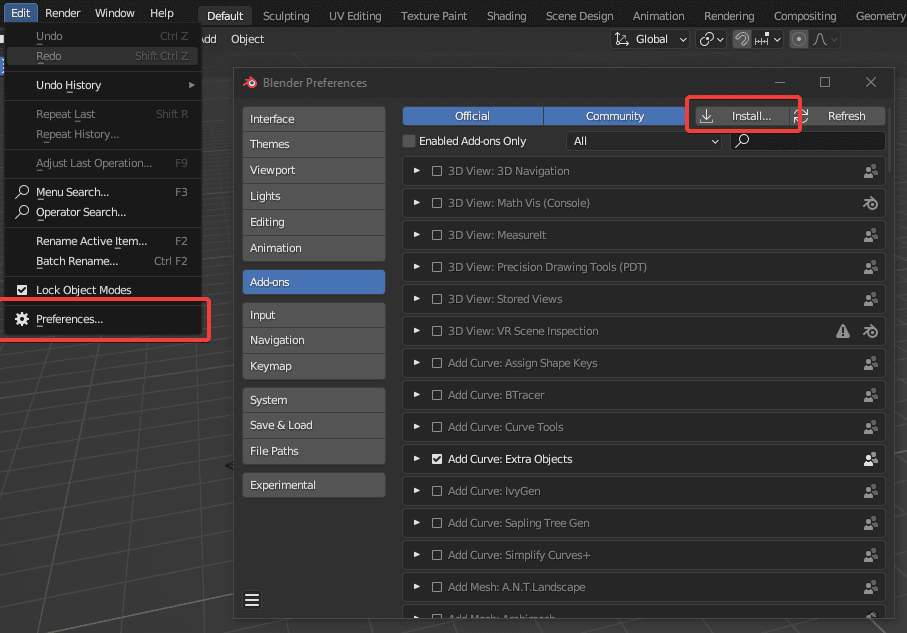
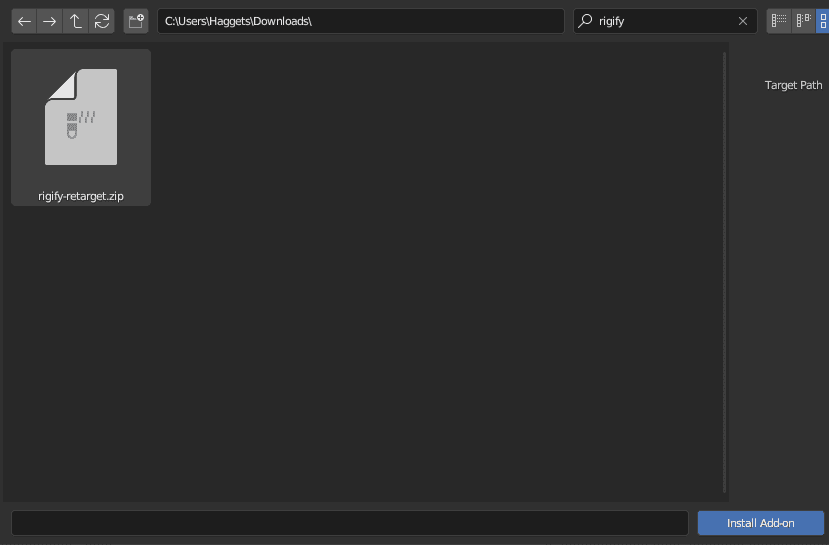
Rigify Retarget can be installed like any other plugin. Go to File, Preferences, Addons and click on "Install", select the plugin, and it should enable automatically.
Toggles
If you click on the drop down icon, you'll be able to find some additional options. Rigify Retarget works as is, if you're not intending to use it for game engines however, these toggles can make it easier to work with certain types of armatures as well as the positioning of them.
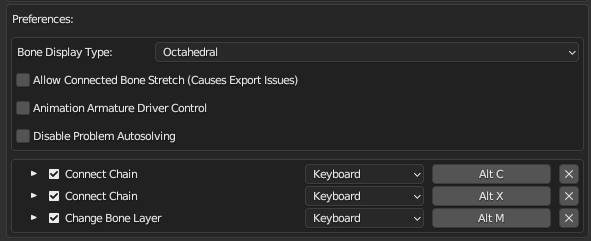
Bone Display Type
The bone type that will be displayed when entering the Armature Builder, up to preference. (Octahedral makes it the easiest to see the bone colors)
Allow Connected Bone Stretch
Allows for armatures with connected bones to stretch just like armatures with disconnected bones, making the use of tweak bones more useful. It is disabled by default since it causes export issues due to how scale inheritance works in game engines.
Animation Armature Driver Control
Allows the animation armature to take control of position, rotation and scale, instead of the other way around.
Disable Problem Autosolving
Series of functions used before and after generation to automatically solve Rigify errors that often don't have useful error messages along them. Should only be disabled if there are Rigify Retarget errors while generating.
Keybinds
If you don't like some keybinds, you are free to modify them to something that suits your needs better.
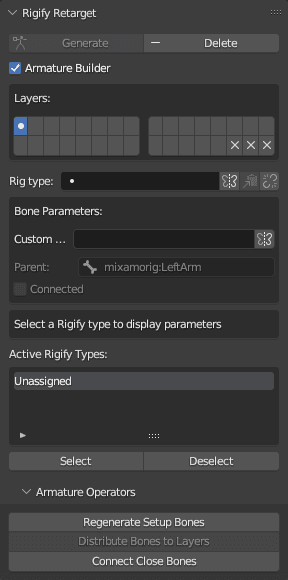
Armature Builder
While selecting an armature, go to the Objects tab in the Properties panel and you'll find "Enter Armature Builder", clicking on it will create a duplicate armature out of the selected one, hiding the original armature and displaying many options. (If the button is grayed out, make sure you're selecting an armature)
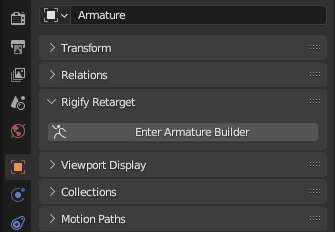
The duplicate armature (Called setup armature) will be in resting position, meaning you won't be able to pose it, as it is intended to be used for marking bones for generation of the animation armature. You can do any changes to it including adding, moving and removing bones, changing bone parenting, adding constraints, etc. The original will remain untouched through all of this and will adapt as best it can to the changes made after generation.
Generate
Generates a Rigify armature from the current setup armature. Make sure at least one bone is marked in the armature, otherwise it will appear disabled.
Delete
Removes both the setup armature and the animation armature if present, alongside all constraints and additional items generated by Rigify (such as widgets and scripts to make the armature function)
Update
Shown after the rig has been generated. Sends you back to the Armature Builder so you can do any changes to the setup armature. All animation, layer and bone parameter data in the animation armature will be safely stored before entering the Armature Builder and will be restored once the rig gets generated again.
Armature Builder Toggle
Toggles on and off the Armature Builder state, allowing you to go to and from the original armature and setup armature.
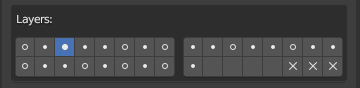
Layers
A list showing all layers in the armature displaying data for all marked bones in the armature, which can also be used to move the selected bone/s to the desired layer. There are 3 types of icons that can show up. A big filled in circle for the currently selected bones, a hollow circle for non selected bones, and a small filled in circle for the extra bones from all bones (such as FK and Tweak layers).
Rig Type
Allows you to mark the currently selected bone with a Rigify type through a dropdown menu that you can type into to search the type needed, as well as an X to clear the Rigify type if the bone has any. There are also a few additional toggles next to it.
When assigning a type, all selected bones will be assigned that type, meaning you can mark many bones at once.

Mirror Rigify Properties
Toggles mirroring of both Rigify type and Rigify parameters, meaning that the pair of any bone selected (If there is any) will copy their type and parameters.
Copy Rigify Properties to Selected
Pastes the Rigify data (Type and parameters) of the active bone to all selected bones.
Ignore During Bone Linking
Causes Rigify to avoid adding any constraints to a bone so their other constraints can handle their movement instead. It is intended for helper bones which are not meant to be handled by the user but by constraints instead.
Bone Parameters
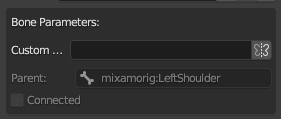
Custom Name
Allows you to input a custom name that the bone will be renamed to in the animation armature. Can be used to have standarized names so animations can be shared across Rigify armatures, and to allow for pose mirroring if the original names have their L/R in a place where Blender does not detect them as pairs.. It has a mirror toggle that will also apply the custom name to the pair of the selected bone.
Parent
The parent of the selected bone, can only be edited in Edit Mode.
Connected
If the selected bone is connected to its parent, can only be edited in Edit Mode.
Rigify Parameters
List of parameters for the current Rigify type of the selected bone, varies between bone type. (More info can be found in Rigify's Wiki)
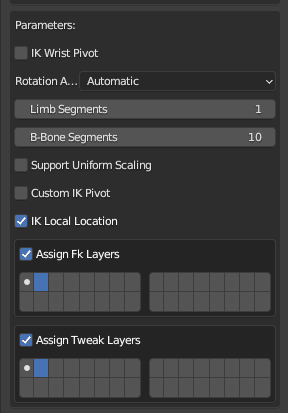
When changing parameters, all selected bones will also have those changes, meaning you can change the parameters of many bones at once.
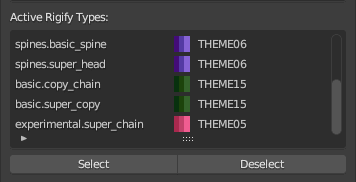
Active Rigify Types
Displays every single active Rigify type in the armature by their name and their color. You can select a certain type by selecting it in the list and clicking "Select", you can also deselect a certain type with "Deselect".
Armature Operators
A set of function that can automate a few processes during setup.
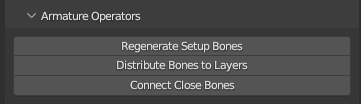
Regenerate Setup Bones
If the original armature is modified in any way during setup. This allows you to mirror those changes to the setup armature so they're in sync once again, adding any missing bones and repositioning existing ones. Keep in mind that any position changes made to the bones in the setup armature may be reverted. And bones that were part of the original armature and deleted will be deleted as well. (Bones that were added during the setup will remain regardless)
Distribute Bones to Layers
If your armature is humanoid and has bone layers, this tries to move any marked bones to the layer that is most fitting for them, including FK and Tweak layers. Works best with Rigify's Default Layer list.
Connect Close Bones
Connects any bones that have their head/parent in the same position as another.
Rigify Bone Layers
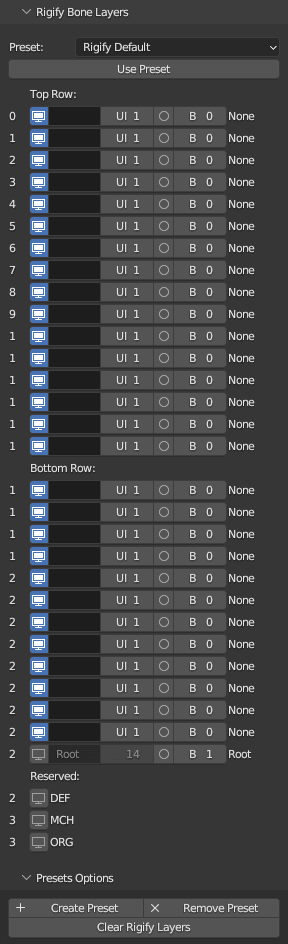
Presets
List of presets for the layer list. By default only the Rigify layout is available but you can create your own presets, or use other people's presets instead. The location of the presets can be found in %APPDATA%/Blender Foundation/Blender/addon_data/rigify_retarget_presets. You can drag and drop presets there and be able to use them right away.
Bone Layer List
A mirror of the layer list from Rigify. Displays layer visibility, name, the UI row they'll be positioned in once generated, the selection set, and the bone group (The color they'll have in the animation armature.)
Preset Options
Where you can create your own preset with a custom name, remove any non default preset, and clear all rigify layers if you applied any preset so you can make changes from scratch.
Operators/Functions
Connect Chain
Enabled with Alt C. Allows you to connect the selected bone to its child, putting their tail where the child's head would be. If the bone is attaching to the wrong child or want to override the parenting to another bone, you can select the desired bone to force that connection.

Extend Last Bone in Chain
Alternatively enabled with Alt X, allows you to extend the current bone instead of connecting it to a parent, useful in cases like hands where you don't want to connect the bone to any finger bones. Keep in mind it uses the parent of the selected bone to extend it along its axis, meaning that if the bone does not have a connected parent, it will not work.
Length scale
The length of the bone in Extend last Bone in Chain is checked.
Lock Tail Axis
When Extend from Last bone in Chain is checked, locks the extended bone from moving in the selected axis. More than one can be selected.
Change Bone Layer
Enabled with Alt M. Displays the list of layers of the armature using the Rigify layer names to identify them.
Assign FK and Tweak layers
Will try to find a fitting layer for the extra bones that may be generated from the selected bone. If no layer can be found, they will be put in the same layer as the selected one.